Engine air filter replacement
During engine operation, the filter separates all impurities from the intake air and it is necessary to perform periodic replacement of the filter. Dust and sand in the air can be very abrasive and shorten engine life if not filtered.
The filter retains impurities and reduces the permeability of air over time. When enough air no longer passes through the filter, the engine cannot produce enough power and fuel consumption increases. All vehicles have a prescribed air filter replacement period based on normal engine operation. However, when the vehicle is used in an unfavourable environment such as dust, the life of the filter is shorter.
A filter of the same size and shape as the original is used for replacement. Periodically between two replacement intervals, it is advisable to check the air filter for excessive dirt or blockage. The best way to check is to remove the filter and place it towards the light source. If little or no light passes through the filter, it should be replaced. Air filters are usually changed every 50,000 km or every other engine oil change.
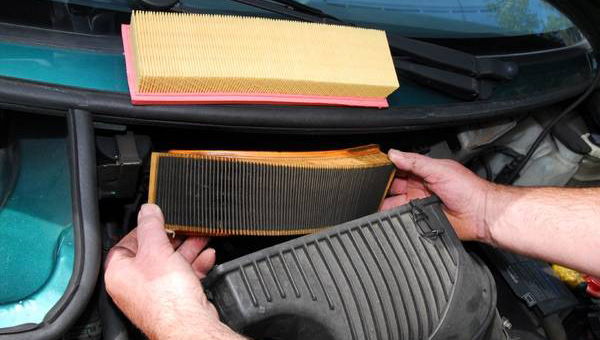
The air filters can be annular or square and are located inside the appropriate box at the very beginning of the engine intake line. After removing the filter housing cover, we carefully remove the old filter so that impurities do not fall into the suction line.
Before installing a new filter, inspect the suction line housing and duct for cracks or holes that would allow unobstructed suction of unfiltered air. If necessary, clean the inside of the case.
We compare the new filter with the old one to make sure they are the same. During installation, we make sure that it fits correctly on the base of the housing. If the filter is not installed correctly, air can bypass the filter and enter the engine without filtering. We place the cover over the filter and fasten it. If we have previously removed it, we connect and tighten the suction hoses with clamps.
To replace the air filter, follow these steps: