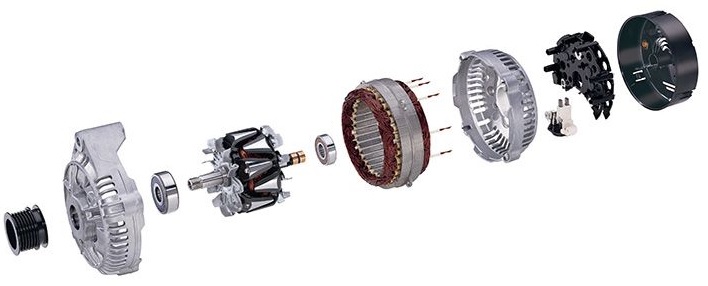
Alternator disassembly
After removal from the vehicle for repair, the alternator is disassembly. A faulty alternator can be the result of many different internal problems. Diodes, stator windings, and rotor windings may be open, shorted, or improperly grounded. Brushes or slip rings may wear out. The voltage regulator may be faulty. The rotor shaft can be bent, the bearings worn, and the pulley can be loose or warped.
For examination, repair, and replacement of alternator elements, it is necessary to disassemble them. Follow the operating instructions for the given alternator during disassembly, testing, and replacement parts.
Depending on the type of alternator, the sequence of actions during disassembly may differ. Here the most common disassembly procedure is described. Before disassembly, mark the housing parts with a marker or chalk to ensure proper assembly of the alternator.
Remove the voltage regulator with brushes.
By unscrewing the screws, remove the screws that connect the alternator covers. Separate the rear part of the alternator cover by gently hitting it with a rubber mallet. If extraction is more difficult due to the bearing, a 2 or 3 yaws puller is used. Carefully separate the front part of the cover with the pulley and the rotor from the stator. During separation, be careful not to damage the stator and rotor windings.
Grip the rotor with a bench vice and remove the pulley with a suitable tool. Then the cover is removed from the rotor shaft. Remove the rotor from the stator by tapping the rotor shaft with a rubber mallet. When you take it out of the cover, the rotor falls, so put a cloth under it in advance.
Depending on the construction of the alternator, the diode plate eventually separates.