Manual bleeding
Since the brake fluid cannot compress, it transmits the brake pressure through the hydraulic system quickly and without loss. However, when air enters the system, the brake pressure transmission is disturbed. The air is compressible, reduces the volume under pressure, and does not transmit thrust through the system. The brakes will be porous and ineffective. That’s why it’s done bleeding brake systems.
Bleeding the hydraulic brake system means that only brake fluid remains in the system. One way is to manually bleed when the assistant presses the brake pedal and you open and close the air release screws on the wheels. This ensures that air and old brake fluid are expelled from the hydraulic brake system.
Manual bleeding requires the least amount of equipment and tools, but it takes more time to expel a larger amount of brake fluid through the system. It is also less effective in removing trapped air in systems that have high points in the brake lines or in vehicles that have a large vertical drop between the master cylinder and the brake blocks, such as a truck. This method is best when only a small amount of brake fluid needs to be drained. Such as after replacing the wheel brake unit or when more expensive equipment is not available.
During manual air release, you need to have an assistant who will slowly depress and release the brake pedal at your request. Successful bleeding requires clear communication between you and your assistant.
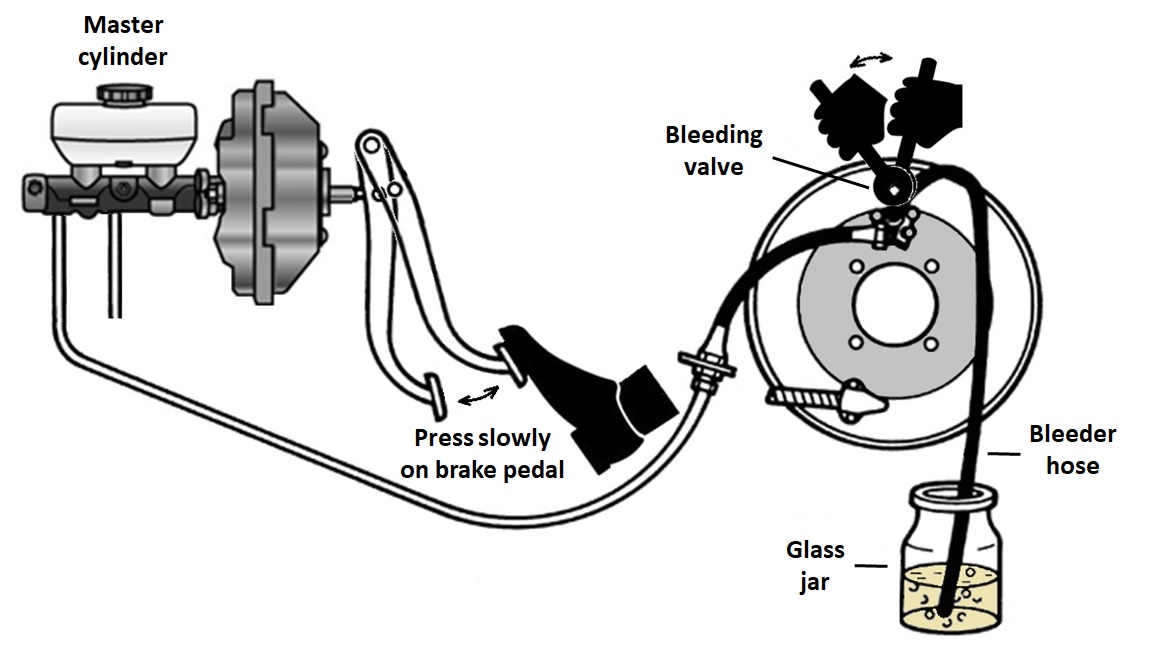
Bleeding starts from the brake unit to the point furthest from the master cylinder. Connect a transparent hose to the bleeding screw. Insert the other end of the hose into a transparent container. Ask the assistant to depress the brake pedal. Unscrew the screw from one quarter to half a turn. Pay attention to the old brake fluid and air bubbles coming out of the hose from the screw.
Manual bleeding
When the brake fluid leak stops, gently close the bleeding screw. The assistant should slowly release the brake pedal. This allows the master brake cylinder to draw new brake fluid from the reservoir, ready to bleeding again.
Repeat the previous three steps until there are air bubbles in the brake unit. Close and tighten the screw to the manufacturer’s specifications. Make sure that the tank is not left without brake fluid during the air release, as this draws air into the brake system. If this happens, it will be more difficult to bleeding from the hydraulic brake system. Check the level in the master cylinder reservoir, top-up, and close again with the tank cap.
Repeat this procedure for each wheel brake unit, moving closer to the master cylinder (one wheel at a time) until the air is removed and the brake pedal is not porous. You may need to start the engine o check that the brake pedal is still firm when a vacuum brake booster is in operation.
To manual bleeding from the brakes, follow these steps: