Cylinder head inspection
An inspection of the cylinder head follows when it is thoroughly cleaned. Checks are connecting surface flatness, cracks, deformation, and wear of the cylinder head parts are checked.
An inspection of the cylinder head follows when it is thoroughly cleaned. Checks are connecting surface flatness, cracks, deformation, and wear of the cylinder head parts are checked.

First, a visual inspection checks that there is no visible damage to the cylinder head casting. Carefully inspect the outer surface and cavities of the cylinder head for any damage or deformation. Major damage and deformation can be visually detected without the use of other test methods. Any detected irregularities should be marked, consider the level of damage, and determine further action.
After visual inspection, the condition of the sealing surface of the cylinder head is checked.
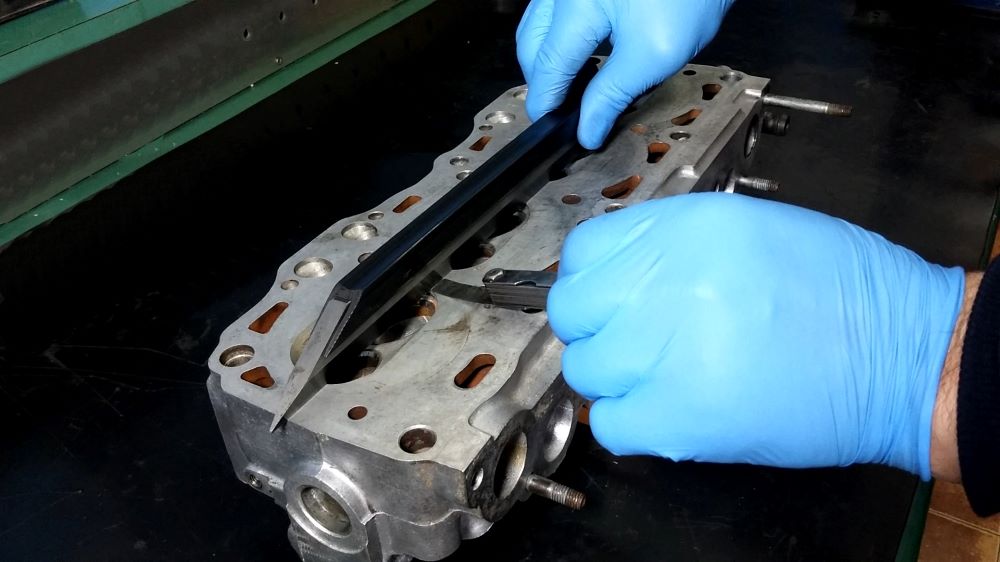
Using flat bars (ruler) measures the deformation of the sealing surfaces of the cylinder head. A simple method is to use a light source that is placed behind the ruler. The light marks the unevenness that appears between the ruler and the sealing surface. This is how we can estimate the degree of deformation of the cylinder head surface.
Calibrated sheets are used to determine the degree of distortion more precisely. The ruler is placed on the sealing surface and the gap between the ruler and the flat plate is checked with a calibrated sheet of 0.03 mm. If the calibrated sheet cannot pass along the entire length of the ruler, then the check on the other part continues to ensure reading over the entire sealing surface of the cylinder head. When a calibrated sheet passes in some part, it means that there is a deformation. Increasing the value of the leaf (0.05 mm, 0.07 mm …) determines the size of the deformation. The last leaf that passes under the ruler is the size of the deformation of the sealing surface of the cylinder head. Finally, the curvature value read is compared with the limit values from the service catalog for that motor. The typical allowable distortion is up to 0.07 mm.
To cylinder head inspection, follow these steps:
Visual inspection
Inspect the cylinder head in detail for any visible deformation and damage. Mark any irregularities and assess the degree of damage. Identify further activities.
Checking flatness sealing surfaces
Place a flat bar (ruler) over the entire sealing surface of the cylinder head. Place a strong light source behind the batten and observe the unevenness. Mark larger deviations. Use the measuring sheets to determine the deviations between the ruler and the surface. Measurements are performed along the length, diagonally, and width. Note any deviation that is greater than the allowable value and determine further actions to repair the unevenness.