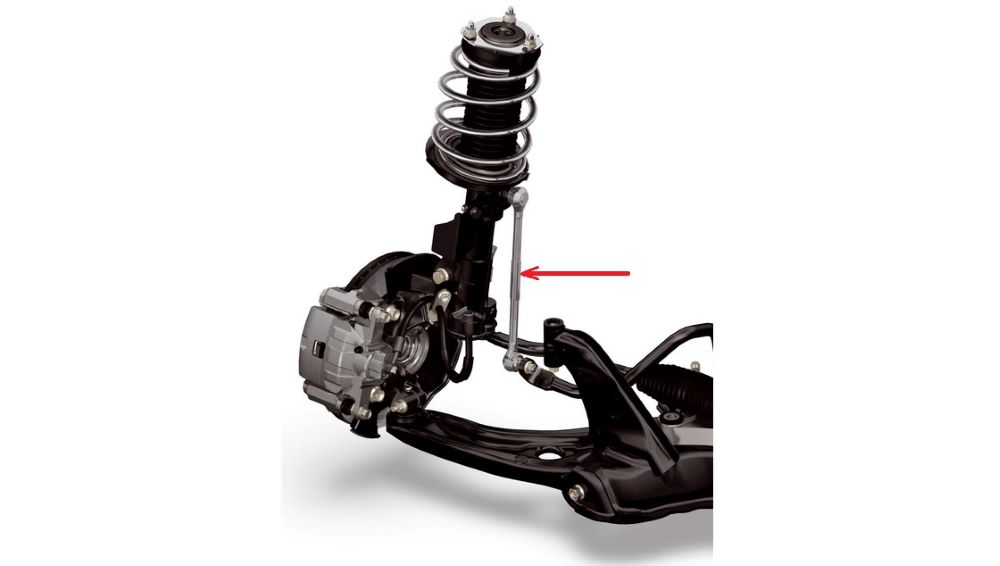
Sway bar link replacement
One of the negative features of elastic suspension is the tilting of the vehicle in a curve. Use a sway bar link to reduce tilting.
One of the negative features of elastic suspension is the tilting of the vehicle in a curve. Use a sway bar link to reduce tilting.

The main task of the sway bar link is to counteract the non-parallel movement between the body and the suspension when the vehicle is cornering. Likewise, the sway bar link regulates the displacement of one wheel relative to the other and prevents the vehicle from tilting.
When the client complains that when driving in a curve, there is knocking, tilting and drifting of the vehicle, it is necessary to check the sway bar link. The most common irregularities on the sway bar link are the appearance of free movement, worn or torn ball end and, less often, a bent or cracked lever between two ball end. The check is carried out by visual inspection of the condition and manual tensioning of the sway bar link to the appearance of free play.
After replacing the sway bar link, it is not necessary to adjust the wheel alignment.
To replace the sway bar link, follow these steps:
Checking the sway bar link condition
Raise the vehicle to the appropriate height with a hoist. Perform a visual inspection of the sway bar link for damage and condition of the ball end. By stretching, check whether there is an irregular movement of the ball end about the holder. If irregularities are detected, replace the sway bar link.
Removing the sway bar link
Remove the wheel. Adjust the height of the vehicle with a hoist. Unscrew ball end nuts with a suitable tool. Separate from the support and remove the sway bar link.
Installation of a new sway bar link
Place the new sway bar link in the support. Using the appropriate tool, tighten the ball end nuts, making sure that they take the correct position about the support. Mount the wheel and lower the vehicle from the hoist.